If you have a blog, content site or single page site chances are you will be interested in understanding how far the users go through your pages. That additional insight of how users consume your content can be achieved by implementing Scroll Depth Tracking. In this post, I will go through the steps that will utilize Google Tag Manager, Google Analytics and a jQuery plugin to achieve that. Additionally, I will try to explain how the different components in GTM – tags, triggers and variables work together to achieve the tracking.
As I go along with the steps, it would be useful to refer to the diagram below that illustrates the dependencies and connections between the GTM components.
![]() I hope that would make the understanding of what happens behind the scenes easier to understand.
I hope that would make the understanding of what happens behind the scenes easier to understand.
And here are the steps:
Step 1 – Scroll Depth Script
In order to measure how far users are scrolling, I am going to use a small jQuery plugin developed by Rob Flaherty from parsnip.io
The script is available here
The first step towards getting the setup ready is copying the source code and pasting it in a New Tag – “Scroll Depth Tracking” in GTM, Custom HTML type.
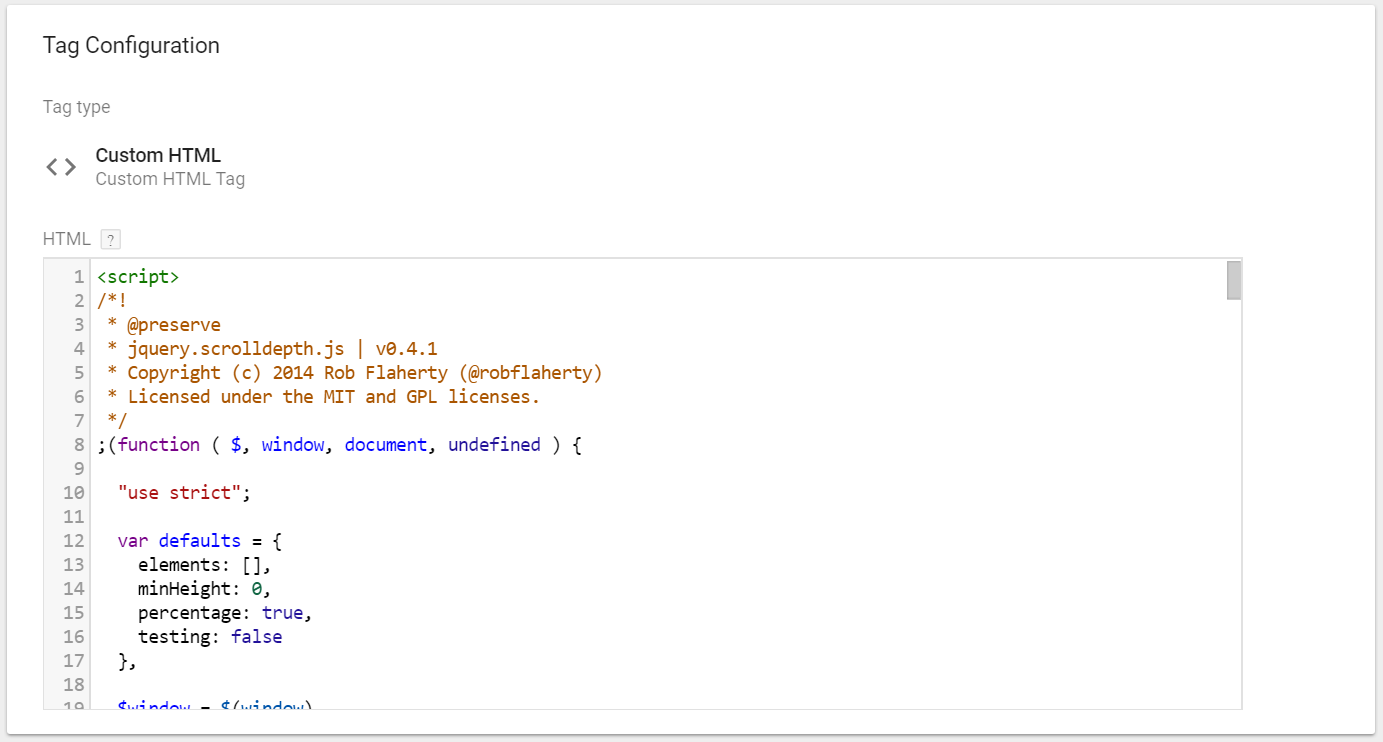
The part of the script that we should put some focus on is the function that sends an event and pushes variables into the Data Layer.
 function sendEvent(action, label, timing) {
      if (!options.testing) {

        if (typeof(dataLayer) !== "undefined") {
          dataLayer.push({'event':'ScrollDistance',
                          'eventCategory':'Scroll Depth',
                          'eventAction': action,
                          'eventLabel': label,
                          'eventValue': 1,
                          'eventNonInteraction': true
                          });

          if (arguments.length > 2) {
            dataLayer.push({'event':'ScrollTiming',
                            'eventCategory':'Scroll Depth',
                            'eventAction': action,
                            'eventLabel': label,
                            'eventTiming': timing
                            });
          }
        } else {

          if (typeof(ga) !== "undefined") {
            ga('send', 'event', 'Scroll Depth', action, label, 1, {'nonInteraction': 1});

            if (arguments.length > 2) {
              ga('send', 'timing', 'Scroll Depth', action, timing, label);
            }
          }

          if (typeof(_gaq) !== "undefined") {
            _gaq.push(['_trackEvent', 'Scroll Depth', action, label, 1, true]);

            if (arguments.length > 2) {
              _gaq.push(['_trackTiming', 'Scroll Depth', action, timing, label, 100]);
            }
          }
        }

      } else {
        $('#console').html(action + ': ' + label);
      }
    }
The value that is passed from ‘event’ – ‘ScrollDistance’ will later be used to create the trigger for the “Event Tag” in GTM. The values that are passed from ‘eventCategory’, ‘eventAction’ and ‘eventLabel’ will be captured as variables in GTM that will then be passed to Google Analytics by the “Event Tag”. ‘eventCategory’, ‘eventAction’ and ‘eventLabel’ will be further examined in the next few steps.
Step 2 – Scroll Depth Script Trigger
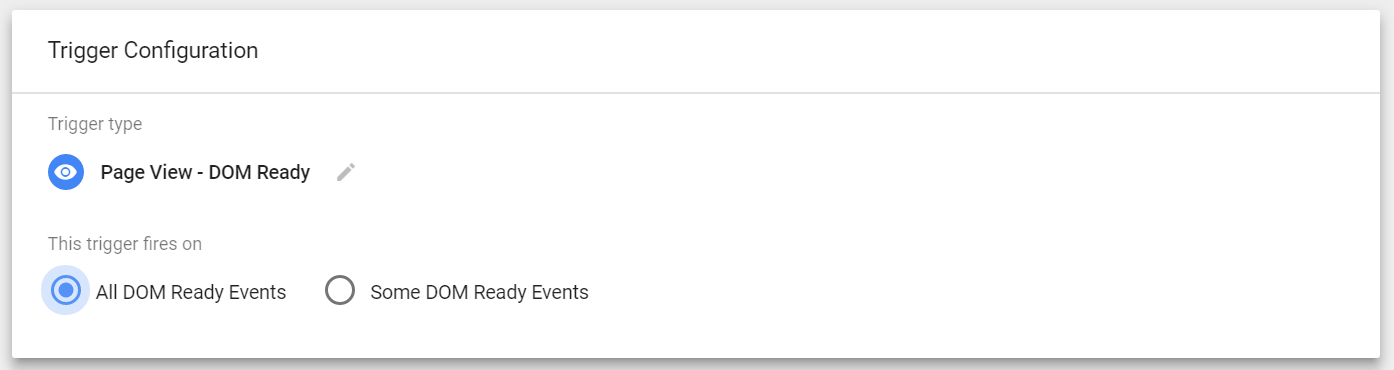
The next step covers the trigger that runs the scroll depth tracking script on the pages that we need it to. In order to do that, a “DOM Ready” trigger will have to be configured. The trigger’s type is “Pageview – DOM Ready” and fires on “All DOM Ready Events”
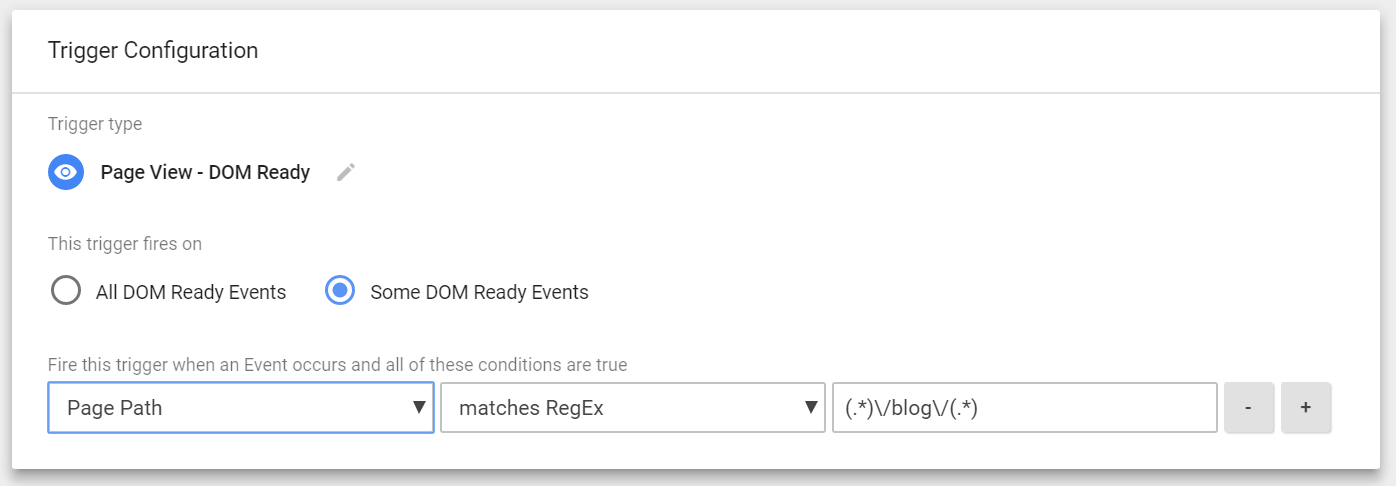
The trigger setup above will make the code fire on all pages, but if we want to be more specific and only run it on blog pages for example (which might be the case for some), the setup can be modified by making the trigger fire on “Some DOM Ready Events” and checking if the Page Path (built in variable) matches RegEx (.*)\/blog\/(.*)
In either of the cases, the result is the same – the condition for when the scroll tracking script should be fired is set.
The Trigger should be added to the “Scroll Depth Tracking Tag” we set in step 1.

Step 3 – Set up variables to hold the passed from the Data Layer values
In this step, GTM variables are created to capture the values passed by the scroll tracking script through the Data Layer. The script from the “Scroll Depth Tracking Tag” that was created in step 1, pushes an event to the Data Layer. This event contains the values for the Google Analytics Event Category, Action and Label.
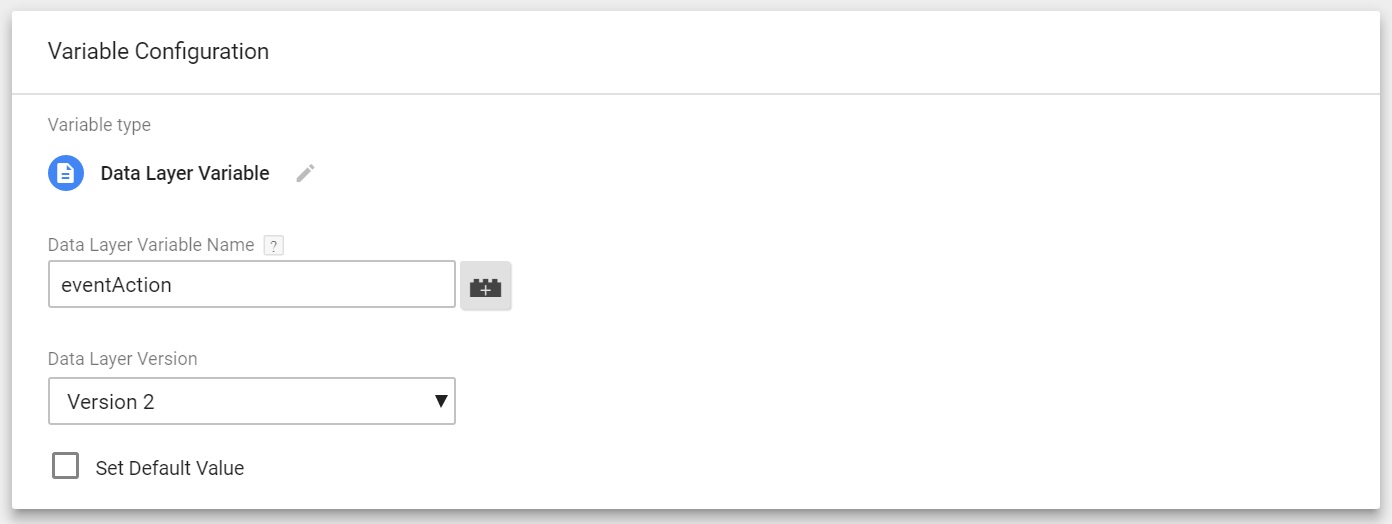
Setting up the GTM variables can be achieved by simply going to the Variables Tab – > User-Defined Variables and clicking New. Name the variable eventCategory, select the type as Data Layer Variable and name it exactly “eventCategory”.
The same should be repeated for “eventAction” and “eventLabel”.

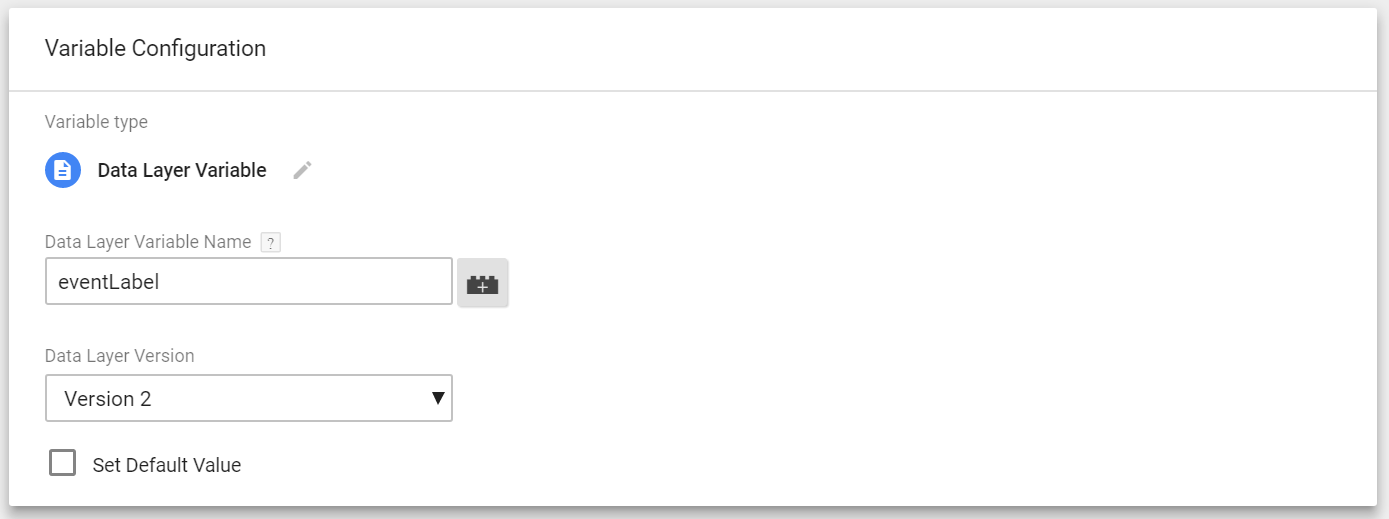
If you scroll up a bit, you can see the code that pushes the event with the values of these into the Data Layer. Depending on the scroll depth, they will have the following values that will be populated in Google Analytics:
eventCategory – “Scroll Depth”
eventAction – “Percentage”
eventLabel – “0%” or “25%” or “50%” or “75%” or “100%” or “Baseline”
The created GTM variables will hold these values depending on the scroll depth.
Step 4 – Creating the Event Tag
The Event’s anatomy in Google Analytics consists of up to 4 components. An Event hit includes a value for each component, and these values are displayed in the reports. These components are Category, Action, Label (optional, but recommended) and Value (optional). The “Event Tag” will use the captured values in the variables and push them in the expected for Google Analytics format.
Here is how the tag is set:
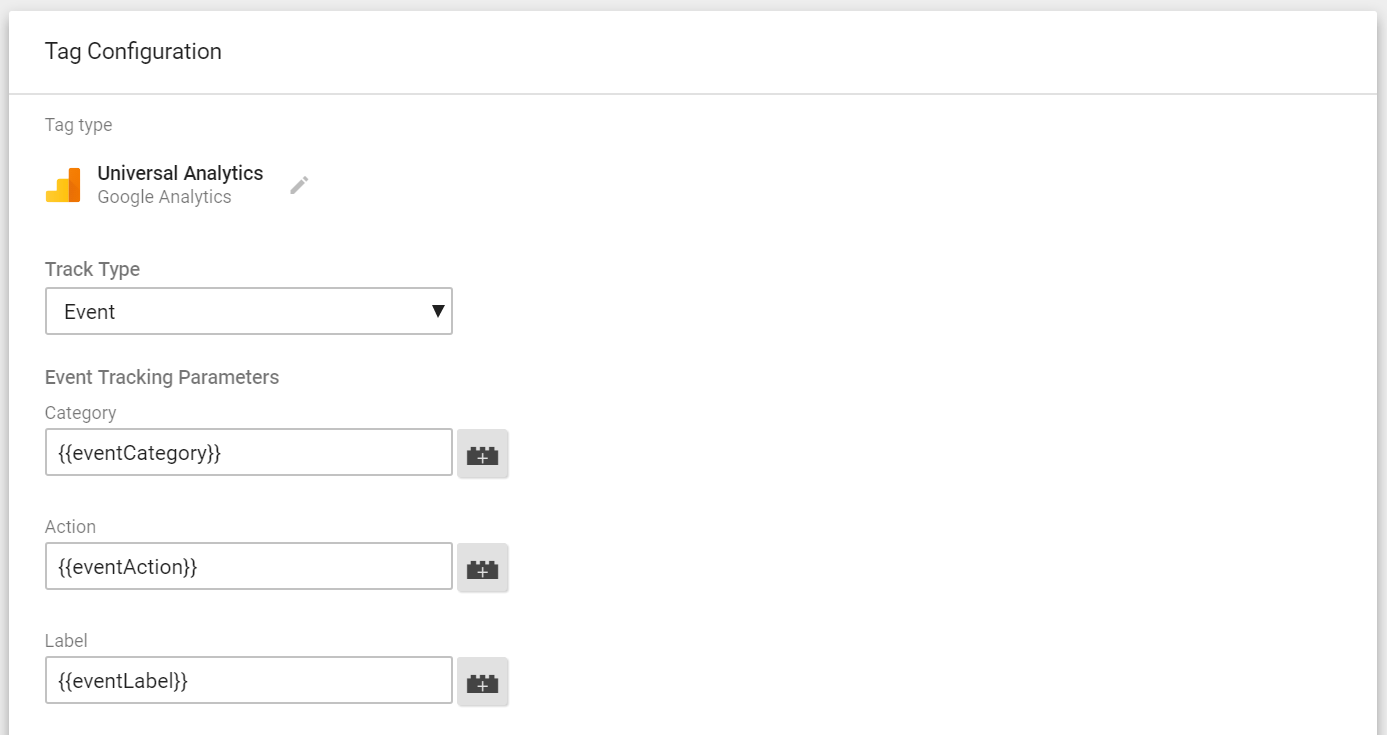
The variables in {{double curly braces}} are the Data Layer variables created in Step 3

Additionally, setting up the “Non Interaction Hit” to True will make the script not count the scroll events that are set as interaction hits which will affect your bounce rate metrics. The Google Analytics Settings field expects the Tracking ID from your property in Google Analytics. In the example below, I have it as a constant variable declared in GTM.

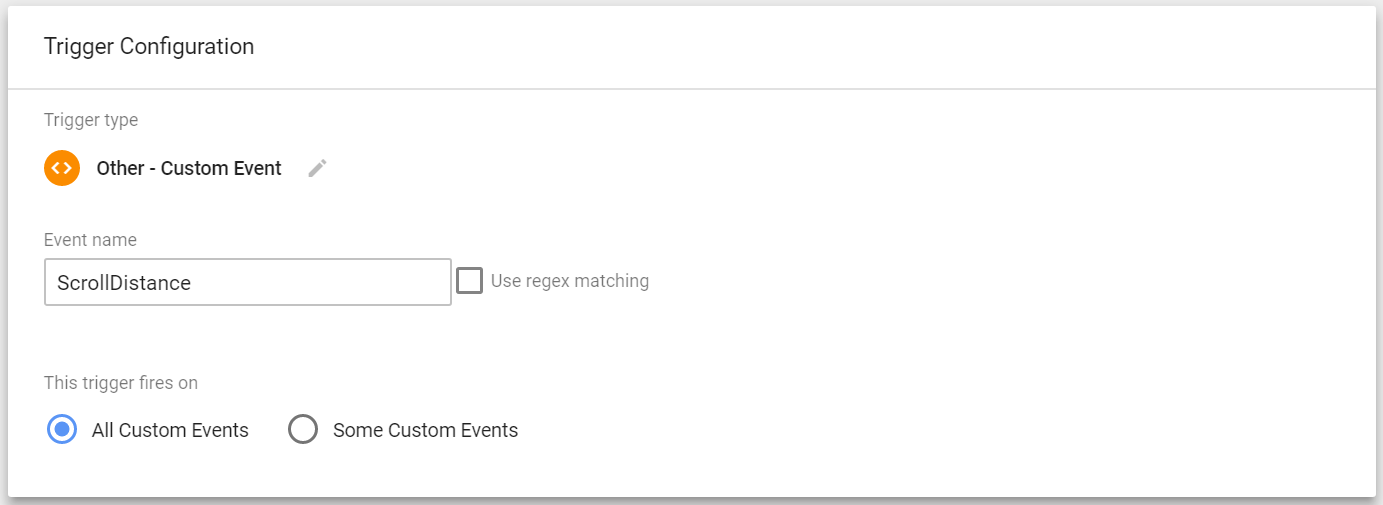
Step 5 – Adding the trigger for the Event Tag
The last step is quite easy. All that needs to be done is to create a new Trigger with a Custom Type and in the filed add “ScrollDistance”. As mentioned in Step 1, the passed “ScrollDistance” will trigger the Event Tag to fire and every time there is a scroll distance achieved (0%, 25%, 50%.. etc) a new event will be fired to Google Analytics via the Event Tag in GTM.
That is all. Following these 5 steps will result in creating the scroll tracking. What is left is to publish the GTM Container. Now you have some additional insight about how your users are consuming your content. I hope the examples also illustrated how GTM works and made it easy to understand.
If you have any questions, please post a comment below 🙂
Share this Post
